- Article Index
- About Us
- Contact
- Language/Idioma
-

-

Flash: The Basics
Making flash and flash exposure easier to understand:
 I’ve
overheard people in the past saying that flash frightens them; it is something they would
prefer to avoid, or more accurately, because they feel it is like looking down the rabbit
hole they would prefer to skip it altogether. But it’s not like that at all. There is
nothing to fear! OK, it might be a rabbit hole or sorts, but to get the basics understood
you don’t need to go too deep. Flash in itself is really only an extension to the understanding
of basic exposure and with the feature-loaded compact cameras and DSLR’s these days you don’t
even need to think about your flash exposure, the camera does it all for you.
I’ve
overheard people in the past saying that flash frightens them; it is something they would
prefer to avoid, or more accurately, because they feel it is like looking down the rabbit
hole they would prefer to skip it altogether. But it’s not like that at all. There is
nothing to fear! OK, it might be a rabbit hole or sorts, but to get the basics understood
you don’t need to go too deep. Flash in itself is really only an extension to the understanding
of basic exposure and with the feature-loaded compact cameras and DSLR’s these days you don’t
even need to think about your flash exposure, the camera does it all for you.
For the purposes of this article we are going to stick to the pure basics, the fundamentals: what is flash? Why and when would you use it? What can you expect when you use it? What sort of equipment do you need? I am going to keep the detailed discussions of TTL Flash, Manual Flash, Fill Flash, Flash High Speed Sync, Max Flash Sync Speed, Bounce Flash, Off-Camera Flash, Master and Slave, Commander Mode, The Inverse Square Law and such specialized topics for later. Each of these requires an article in itself. Here we will only be talking about direct, unmodified on-camera flash using either the camera's built-in flash or a hotshoe mounted flash unit.
First up: What is flash? Simply put, flash is a supplemental light source that you can add to a scene to change the exposure characteristics of the scene. It is a very quick pulse of light that you can use to good effect when you need to light up your subject.
When should you use flash? To answer this question let’s just talk about light in general. There are two types of light that you need to consider as a photographer: Ambient (or continuous) light and Flash (non-continuous) light. Ambient light is what is regarded as the light that currently exists in the scene you are photographing. So this light could be the lighting in a room, sunlight, street lighting, a video light that you have set up, in fact any form of continuous light that is present in the scene you are trying to photograph. The reason I say continuous is because all of the light sources mentioned above do not turn on and off, they would normally stay constant with the same level of intensity for the time you need to take a picture. This continuous lighting we will now call “Ambient” or “Available” light. It is the light that is available to you without having to use an additional light source such as a flash.
 With
this ambient light, as a photographer, you can then expose for the
ambient (available) light only. So really what this means is you configure your camera settings (or
let the camera do it for you) such that you get good exposure for this available light. This is
achieved by setting up your camera in any exposure mode (Program, Shutter, Aperture or Manual)
and ensuring your scene is reasonably well exposed using the Histogram or display on the back
of the camera.
With
this ambient light, as a photographer, you can then expose for the
ambient (available) light only. So really what this means is you configure your camera settings (or
let the camera do it for you) such that you get good exposure for this available light. This is
achieved by setting up your camera in any exposure mode (Program, Shutter, Aperture or Manual)
and ensuring your scene is reasonably well exposed using the Histogram or display on the back
of the camera.
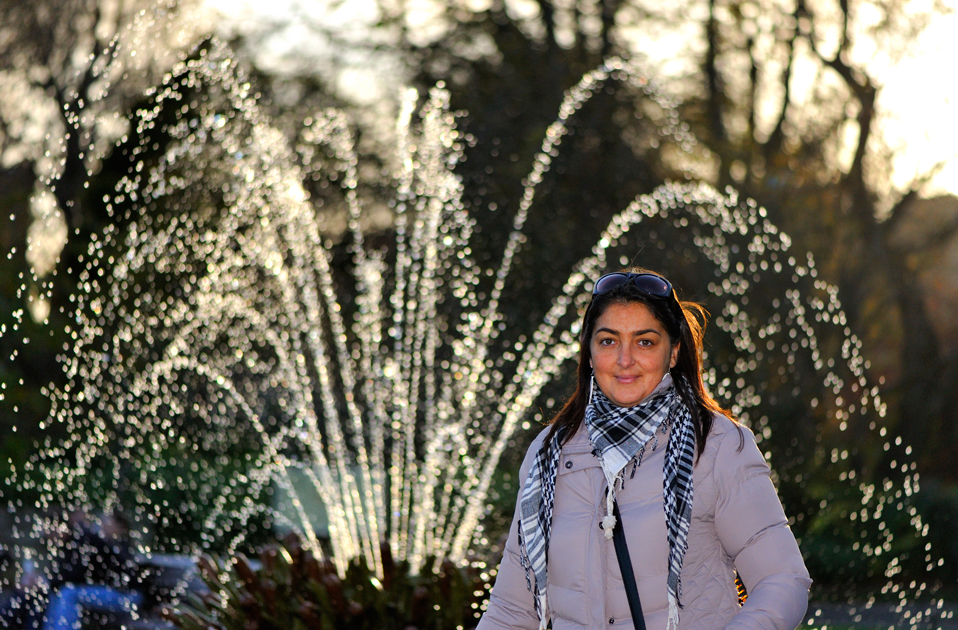
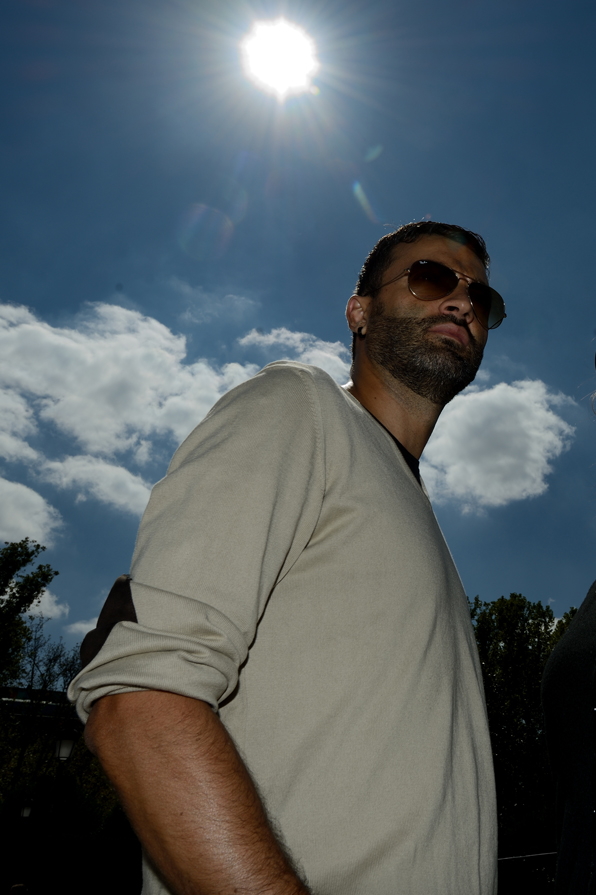
Now, what if the scene itself is well exposed but your subject is not correctly exposed? The
overall scene can be correctly exposed but your subject (a person or an object) might be too
dark, it might have too much contrast or may look lifeless. Your subject may also be blurred
if the available light is low and the shutter speed is too long. These scenarios will happen
regularly if you are photographing in low light, in intense sunlight, in strong side light or
overhead light for example. So, again, even though you have correctly exposed for the overall
 scene, the lighting on your subject may be far from correct. You can choose to overexpose the
ambient light which may brighten up your subject, but overexposing will “blow-out” elements of
your image which can be determined by the blinking highlights on your LCD or histogram showing
an exposure that is bunched up to the right clipping the far right hand limit (see
'bunched-up-to-the-right' histogram). Sometimes overexposure can be used for effect but in many
cases you may want to avoid this and choose to capture an image with a correctly exposed subject
and background.
scene, the lighting on your subject may be far from correct. You can choose to overexpose the
ambient light which may brighten up your subject, but overexposing will “blow-out” elements of
your image which can be determined by the blinking highlights on your LCD or histogram showing
an exposure that is bunched up to the right clipping the far right hand limit (see
'bunched-up-to-the-right' histogram). Sometimes overexposure can be used for effect but in many
cases you may want to avoid this and choose to capture an image with a correctly exposed subject
and background.
Enter your trusty and ever-reliable flash. I am not talking about a big fancy speed light mounted on the cameras hot shoe, let’s just keep it simple by referring to your cameras built in flash, we can graduate up to a hot shoe mounted flash in a moment. When you supplement the available light with flash light you will lift the lighting on your subject providing your subject is near to the camera. Flash will get rid of shadows; it will lift your subject from the background. Even though the light from your built-in flash is direct and harsh, in low light it will still give you better exposure of your subject than you had without flash.
OK, let’s just step through this again to summarise the important points:
- You are photographing a scene with a camera with built-in flash (a good compact camera or SLR type camera).
- You let your camera configure the settings for you (automatic exposure) to expose the scene. This is what is called the ambient exposure.
- After taking a photo, you check your LCD and find your subject is either blurred, is in shadow, or is not lit at all. You decide your subject needs additional lighting.
- You activate the flash on your camera and let the camera automatically calculate the flash output to light your subject. This is what is called the flash exposure.
- Taking the picture again you check the cameras LCD and decide your subject is now well lit.
Two important things occurred here, you firstly let the camera calculate the ambient exposure and secondly you let it calculate the flash exposure. This concept is absolutely vital when it comes to flash photography. You do not have one exposure, you have two. This is fundamental to flash photography and is the most important concept on this page.
 Let’s
step things up a gear. From this point on I am going to assume you have a hot shoe mounted flash
and a camera with manual control. I am also going to assume that you have an understanding of basic
exposure. For the purposes of this article we will leave our flash (strobe) in automatic metering
mode also known as TTL/iTTL (through the lens) metering. Leaving the flash in TTL will make things
a lot simpler. Not because it is an idiot way of using your flash (I use TTL almost all the time when
not in studio), but becuase TTL metering these days is very very reliable. Another point to mention,
if you are serious about flash photography then I would strongly suggest that you get into the habit
of using manual exposure mode. It will give you the most control over your camera and will ensure your
exposures are more consistent. This will allow you to fine tune both your ambient exposure
and your flash exposure more easily than with any of the other exposure modes.
Let’s
step things up a gear. From this point on I am going to assume you have a hot shoe mounted flash
and a camera with manual control. I am also going to assume that you have an understanding of basic
exposure. For the purposes of this article we will leave our flash (strobe) in automatic metering
mode also known as TTL/iTTL (through the lens) metering. Leaving the flash in TTL will make things
a lot simpler. Not because it is an idiot way of using your flash (I use TTL almost all the time when
not in studio), but becuase TTL metering these days is very very reliable. Another point to mention,
if you are serious about flash photography then I would strongly suggest that you get into the habit
of using manual exposure mode. It will give you the most control over your camera and will ensure your
exposures are more consistent. This will allow you to fine tune both your ambient exposure
and your flash exposure more easily than with any of the other exposure modes.
 OK,
earlier we mentioned that the flash exposure is in fact the second of two exposures. First there
is the ambient exposure then there is the flash exposure. The ambient exposure is dependent on Aperture,
Shutter Speed and ISO. These form the sides of the exposure triangle (see photo). Flash exposure does
not depend on shutter speed. The reason for this is because the pulse of light generated by your flash
is of a far shorter duration than your shutter speed. Flash pulse durations can be of the 1/25,000 of
a second, far quicker than any shutter speed. So as a result, keeping your shutter open for longer does
not mean your subject will be more illuminated by the flash; all it will do is let the camera sensor
record more ambient light and possibly lead to blur.
OK,
earlier we mentioned that the flash exposure is in fact the second of two exposures. First there
is the ambient exposure then there is the flash exposure. The ambient exposure is dependent on Aperture,
Shutter Speed and ISO. These form the sides of the exposure triangle (see photo). Flash exposure does
not depend on shutter speed. The reason for this is because the pulse of light generated by your flash
is of a far shorter duration than your shutter speed. Flash pulse durations can be of the 1/25,000 of
a second, far quicker than any shutter speed. So as a result, keeping your shutter open for longer does
not mean your subject will be more illuminated by the flash; all it will do is let the camera sensor
record more ambient light and possibly lead to blur.
To ensure a flash photo is well exposed, generally speaking, you need to ensure your ambient and flash exposures are well balanced. In the case of automatic/TTL flash metering this is done by configuring your Aperture, Shutter Speed and ISO for your ambient exposure and then modifying FEC or Flash Exposure Compensation to control the output from the flashgun. If your subject is further away from the camera then you may need to increase the FEC. Increasing the FEC increases the power output of the flashgun. The further your subject is away from the camera the more power you will need to ensure your subject is correctly lit (see Inverse Square Law).
 So, in summary, the goal is to ensure the lighting of your subject and the ambient lighting are well
balanced. This is achieved by the two-step process of firstly exposing for the ambient light (by setting
aperture, ISO and shutter speed accordingly) and secondly by exposing for your subject by riding the FEC
on your camera. This two-step process should work every time once you are operating within the limits of
your camera and flash. And it is as simple as that. Once you nail this then that is the basics of flash
understood. As an aside, it is best to try and avoid having photos looking too “flashy”. If you can take
a flash photo where the subject lighting consistently looks natural and pleasant then you are well on your
So, in summary, the goal is to ensure the lighting of your subject and the ambient lighting are well
balanced. This is achieved by the two-step process of firstly exposing for the ambient light (by setting
aperture, ISO and shutter speed accordingly) and secondly by exposing for your subject by riding the FEC
on your camera. This two-step process should work every time once you are operating within the limits of
your camera and flash. And it is as simple as that. Once you nail this then that is the basics of flash
understood. As an aside, it is best to try and avoid having photos looking too “flashy”. If you can take
a flash photo where the subject lighting consistently looks natural and pleasant then you are well on your
 way to controlling your flash exposure. You will learn very quickly that achieving natural looking light
is almost impossible to do with direct flash (flash pointing directly at your subject). This type of light
is the worst of all (well actually it is not, no light is probably the worst) as it kills shape and makes
your subject appear one-dimensional. It is the most unflattering form of light.
This is why a hot shoe mounted flash with a rotating head is the very minimum required
for taking nice flash based photos. The rotating head will allow you bounce the flash off a surface creating
a more directional and diffused, off-camera light effect. A hot shoe mounted flash does have another
distinct advantage: If your camera has a popup flash that can be used to trigger an external flash placed
off camera, then you have the makings of an off-camera lighting setup. Though pure-bred professional DSLRs
will not have a pop-up flash (D3S, D4 etc) sometimes this can be a disadvantage and was
one of my reasons for choosing the
D800 over the more professional D4. All this being said, if direct flash
is all you can manage then it is better to use direct to correctly expose your subject as opposed to an under
exposed, unlit subject. I have used my popup flash when in a tight spot when I didn’t have my flashgun to hand.
That said, I would have dialled my FEC right down to avoid the horrible flashy look.
You can change the position of your subject to get more ambient light if that option is available but to me
it’s all about getting the shot, and if direct light is all you have, then use it.
way to controlling your flash exposure. You will learn very quickly that achieving natural looking light
is almost impossible to do with direct flash (flash pointing directly at your subject). This type of light
is the worst of all (well actually it is not, no light is probably the worst) as it kills shape and makes
your subject appear one-dimensional. It is the most unflattering form of light.
This is why a hot shoe mounted flash with a rotating head is the very minimum required
for taking nice flash based photos. The rotating head will allow you bounce the flash off a surface creating
a more directional and diffused, off-camera light effect. A hot shoe mounted flash does have another
distinct advantage: If your camera has a popup flash that can be used to trigger an external flash placed
off camera, then you have the makings of an off-camera lighting setup. Though pure-bred professional DSLRs
will not have a pop-up flash (D3S, D4 etc) sometimes this can be a disadvantage and was
one of my reasons for choosing the
D800 over the more professional D4. All this being said, if direct flash
is all you can manage then it is better to use direct to correctly expose your subject as opposed to an under
exposed, unlit subject. I have used my popup flash when in a tight spot when I didn’t have my flashgun to hand.
That said, I would have dialled my FEC right down to avoid the horrible flashy look.
You can change the position of your subject to get more ambient light if that option is available but to me
it’s all about getting the shot, and if direct light is all you have, then use it.
If you like this article or others on the site then check out and “like” our Facebook page and you will get details of new articles posted straight to your newsfeed as soon as they are posted on our site. You can also find us on Google and Twitter. Author: Imagen Estilo
Testimonials
 Recently I had the pleasure of shooting with David and Sonia, I found them both to be very talented and professional to the nth degree. The images from our shoot are just fabulous! Lynne K
The whole family are completely blown away. The quality of the images are just amazing. Thank you so so much. C and F
Contact
![]() +34-677-695-450
+34-677-695-450
![]() +353-86-8370321
+353-86-8370321
Email: info@imagen-estilo.com
![]()
![]()
![]()
![]()
![]()
Imagen-Estilo ©
All Rights Reserved
Design by: David Cummins
Going Shopping? Check out our recommended "Resource Guide"